实例介绍
【实例简介】车牌识别率 需要进一步提升
【实例截图】
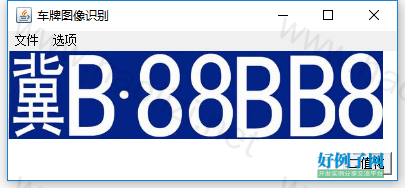
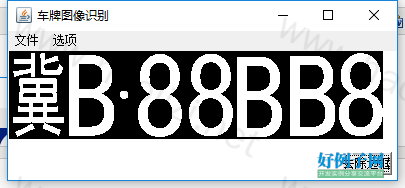
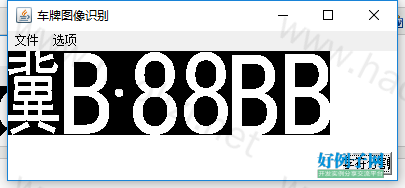
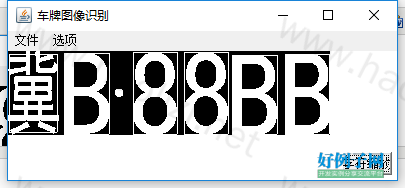
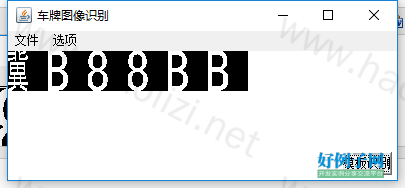
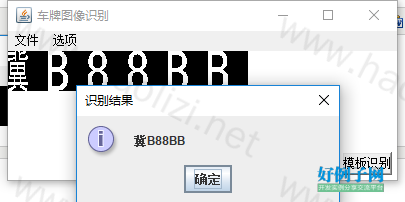
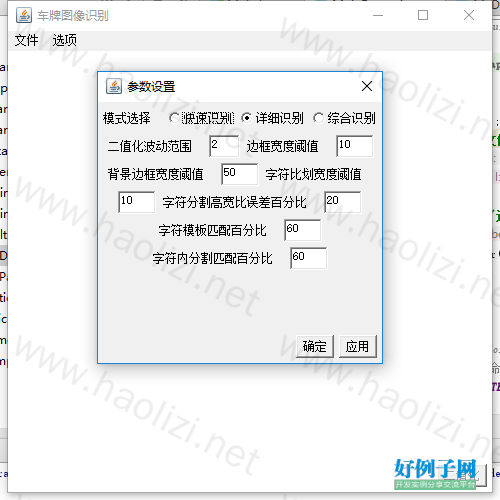
【核心代码】
package lqk;
import java.awt.*;
import java.awt.event.*;
import java.awt.image.ColorModel;
import java.awt.image.ImageProducer;
import java.awt.image.MemoryImageSource;
import java.awt.image.PixelGrabber;
import java.io.File;

import javax.swing.JOptionPane;

class MainFrame extends Frame implements  ActionListener{
	 /**
	 *
	 */
	private static final long serialVersionUID = 1L;
	//什么是全局变量,那就是全局都要引用的,其它的都是局部变量
	//窗口对象
	private FileDialog filedialog_load;//声明1个打开文件对话筐
	private MyDialog options;
	private MenuItem itemOpen=null,itemOption=null;
	private MyPanel center=null;
	private Button next=null;
	//图像数据
	private Image image;//通过image对象,将图像画出来
	private int[][] gray;
	private int[] pixels,hy,vx;
	private int alpha=255,width,height,length;//透明度255是完全不透明
	private ColorModel cm=ColorModel.getRGBdefault();
	MainFrame(){
		//初始化窗体
		super("车牌图像识别");
		setSize(500,500);
	    setVisible(true);
	    //Image image=Toolkit.getDefaultToolkit().createImage(file.getAbsolutePath());
	    //this.setIconImage(image);
	    addWindowListener(new WindowAdapter(){
	    	public void windowClosing(WindowEvent e){
	    		System.exit(0);}
            });

	    //定义菜单栏
	    MenuBar menubar=new MenuBar();
	    Menu file=new Menu("文件");
	    itemOpen=new MenuItem("打开文件");
	    itemOpen.addActionListener(this);
	    file.add(itemOpen);
	    Menu option=new Menu("选项");
	    itemOption=new MenuItem("参数设置");
	    itemOption.addActionListener(this);
	    option.add(itemOption);
	    menubar.add(file);
	    menubar.add(option);
	    setMenuBar(menubar);
	    //定义组件和布局,Frame默认是BorderLayout布局
	    center=new MyPanel();//根据命令显示原始和经过处理的图片
	    add(center,BorderLayout.CENTER);
	    Panel south=new Panel();

	    next=new Button("二值化");
	    next.setEnabled(false);
	    next.addActionListener(this);


	    south.setLayout(new FlowLayout(FlowLayout.RIGHT));
	    south.add(next);
	    add(south,BorderLayout.SOUTH);

	    options=new MyDialog(this,"参数设置",true);

	    //定义对话框
	    filedialog_load=new FileDialog(this,"打开文件话框",FileDialog.LOAD);
	    filedialog_load.addWindowListener(new WindowAdapter()//对话框增加适配器
	    {public void windowClosing(WindowEvent e)
        	{  filedialog_load.setVisible(false);}});

	    validate();
	}

	    /*基本的流程就是这样,经过每一步的处理,Image,pixels,width和height就会发生变化。
	     *
	     * */
		public void actionPerformed(ActionEvent e) {
			// TODO Auto-generated method stub
			if(e.getSource()==itemOpen){
				filedialog_load.setVisible(true);
		        if(filedialog_load.getFile()!=null){
		        	  //获取选中的图像路径
		        	File file= new
		                      File(filedialog_load.getDirectory(),filedialog_load.getFile());
		        	 //根据路径得到原始图像
		        	image=Toolkit.getDefaultToolkit().createImage(file.getAbsolutePath());
		        	imageToPixels(image);
		        	this.setSize(width 30, height 100);
		        	next.setLabel("二值化");
		        	next.setEnabled(true);
		         }
		    }
			if(e.getSource()==itemOption){
				options.setVisible(true);
			}
			if(e.getSource()==next){
				 //得到经过二值化处理的图像
				String label=next.getLabel();
				if(label.equals("二值化")){
					gray=pixelsToGrayArray();
					Binary k=new Binary(gray,width,height);
					gray=k.binary();
					next.setLabel("去除边框");
				    image=grayArrayToImage(gray,width,height);
				}
				else if(label.equals("去除边框")){
					RemoveFrame rf=new RemoveFrame(gray,width,height);
					rf.removeFrame();
					gray=rf.getGrayArray();
					height=rf.getHeight();
					width=rf.getWidth();
					image=grayArrayToImage(gray,width,height);
					next.setLabel("字符分割");
				}
				else if(label.equals("字符分割")){
					CharacterDivide cd=new CharacterDivide(gray,width,height);
					cd.divide();//字符分割
					hy=cd.getHy();
					vx=cd.getVx();
					length=cd.getLength();
					if(length>14){
						JOptionPane.showMessageDialog(this,
								"识别的字符数目超过7个,请更改参数设置!","警告对话框",JOptionPane.WARNING_MESSAGE);
					}
					if(Options.MODELVALUE==0){//快速识别模式,在字符分割以后,对字母和数字进行内分割
						InnerDivide id=new InnerDivide(gray,hy,vx,width,height);
						image=grayArrayToImage(id.paintF(),width,height);
					}else{//详细识别模式
						image=grayArrayToImage(cd.paintHVF(),width,height);
					}
					next.setLabel("字符缩放");

				}
				else if(label.equals("字符缩放")){
					CharacterZoom zoom=new CharacterZoom(gray,hy,vx);
					if(Options.MODELVALUE==0){//快速识别模式
						//Zoom zoom=new Zoom(gray);
						image=grayArrayToImage(zoom.zoom(vx[0],hy[0],vx[1]-vx[0],hy[1]-hy[0]),20,40);
					}
					else{
						image=grayArrayToImage(zoom.paintGray(),20*length,40);
					}
					next.setLabel("模板识别");
				}
				else if(label.equals("模板识别")){
					if(Options.MODELVALUE==0){
						QuickIdentify identify=new QuickIdentify(gray,hy,vx);
						JOptionPane.showMessageDialog(this,
								identify.judge(),"识别结果",JOptionPane.INFORMATION_MESSAGE);
					}
					else if(Options.MODELVALUE==1){
						DetailedIdentify identify=new DetailedIdentify(gray,hy,vx);
						JOptionPane.showMessageDialog(this,
								identify.judge(),"识别结果",JOptionPane.INFORMATION_MESSAGE);
					}
					else{
						MultipleIdentify identify=new MultipleIdentify(gray,hy,vx);
						JOptionPane.showMessageDialog(this,
								identify.judge(),"识别结果",JOptionPane.INFORMATION_MESSAGE);
					}
					next.setEnabled(false);
				}
			}
			center.setImage(image);
        	center.repaint();

		}
		public void imageToPixels(Image image){//为全局变量pixels,iw,ih赋值
			MediaTracker tracker=new MediaTracker(this);//这里有一个this,导致该方法不能分离到别的类中
			//Image img=Toolkit.getDefaultToolkit().createImage(imagePath);
			tracker.addImage(image, 0);

			//等待图像完全加载
			try{
				tracker.waitForID(0);
			}catch(InterruptedException e){
				e.printStackTrace();
			}

			//获取图像的宽度和高度
			width=image.getWidth(this);
			height=image.getHeight(this);

			//提取图像的像素
			pixels=new int[width*height];
			try{
			PixelGrabber pg=new PixelGrabber(image,0,0,width,height,pixels,0,width);
			pg.grabPixels();
			}catch (InterruptedException e) {
				e.printStackTrace();
			}

			//对RGB值和Alpha值进行重新计算和赋值
			int gray;
			alpha=cm.getAlpha(pixels[0]);
			for(int i=0;i<width*height;i  ){
				int red=cm.getRed(pixels[i]);
				int green=cm.getGreen(pixels[i]);
				int blue=cm.getBlue(pixels[i]);
				gray=(int)(red*0.3 green*0.59 blue*0.11);
				pixels[i]=alpha<<24|gray<<16|gray<<8|gray;
				/*是将pixels[i]赋值为如下:
				 * pixels[i]  第3字节 第2字节 第1字节 第0字节
                              alpha  red green blue
				 * */
			}

		}
		public Image grayArrayToImage(int[][]gray,int width,int height){
			Image image=null;
			int []pixels=new int[width*height];
	    	int g;
	    	for(int i=0;i<height;i  )
				for(int j=0;j<width;j  ){
					g=gray[i][j]*255;//如果是1的话就是255,如果是0的话,还是0
					//g=gray[i][j];
					pixels[i*width j]=alpha<<24|g<<16|g<<8|g;
				}
	    	ImageProducer ip=new MemoryImageSource(width,height,pixels,0,width);
			image=createImage(ip);
			return image;
		}
		/*public Image pixelsToImage(int []pixels,int width,int height){//根据像素和宽高产生一幅图像
			Image image=null;
			ImageProducer ip=new MemoryImageSource(width,height,pixels,0,width);
			image=createImage(ip);
			return image;
		}*/
		public int[][] pixelsToGrayArray(){
			int [][]grayArray=new int[height][width];
			for(int i=0;i<width*height;i  ){
				int red=cm.getRed(pixels[i]);
				int green=cm.getGreen(pixels[i]);
				int blue=cm.getBlue(pixels[i]);
				int gray=(int)(red*0.3 green*0.59 blue*0.11);
				//pixels[i]=alpha<<24|gray<<16|gray<<8|gray;
				grayArray[i/width][i%width]=gray;
			}
			return grayArray;
	    }
}
好例子网口号:伸出你的我的手 — 分享!
网友评论
小贴士
感谢您为本站写下的评论,您的评论对其它用户来说具有重要的参考价值,所以请认真填写。
- 类似“顶”、“沙发”之类没有营养的文字,对勤劳贡献的楼主来说是令人沮丧的反馈信息。
- 相信您也不想看到一排文字/表情墙,所以请不要反馈意义不大的重复字符,也请尽量不要纯表情的回复。
- 提问之前请再仔细看一遍楼主的说明,或许是您遗漏了。
- 请勿到处挖坑绊人、招贴广告。既占空间让人厌烦,又没人会搭理,于人于己都无利。
关于好例子网
本站旨在为广大IT学习爱好者提供一个非营利性互相学习交流分享平台。本站所有资源都可以被免费获取学习研究。本站资源来自网友分享,对搜索内容的合法性不具有预见性、识别性、控制性,仅供学习研究,请务必在下载后24小时内给予删除,不得用于其他任何用途,否则后果自负。基于互联网的特殊性,平台无法对用户传输的作品、信息、内容的权属或合法性、安全性、合规性、真实性、科学性、完整权、有效性等进行实质审查;无论平台是否已进行审查,用户均应自行承担因其传输的作品、信息、内容而可能或已经产生的侵权或权属纠纷等法律责任。本站所有资源不代表本站的观点或立场,基于网友分享,根据中国法律《信息网络传播权保护条例》第二十二与二十三条之规定,若资源存在侵权或相关问题请联系本站客服人员,点此联系我们。关于更多版权及免责申明参见 版权及免责申明


支持(0) 盖楼(回复)